Eric attempts to fly, sort of. Eric builds a camera and video transmitter into an RC plane. | ||
| I recently saw this video of a man who built a video camera into an RC airplane and flew it around while looking at the live feed from his camera, transmitted via wireless. He also installed gyros on his video goggles which control the pan and tilt of the camera. This gives him the ability to "look around" while flying, greatly enhancing the experience. Of course I had to build one for myself. And, I decided to photo-document the process. The video has a reference to Black Widow AV where I purchased a 600mw transmitter, receiver and camera. | ||
 |  | |
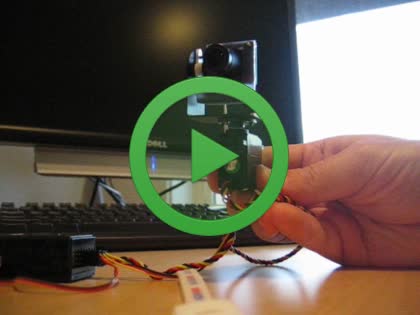
| The first step was to build a power supply for the camera and transmitter. I used an old brushed motor controller which has a built in BEC (Battery Eliminator Circuit) which is basically a voltage regulator. | The camera is very small. | |
 |  | |
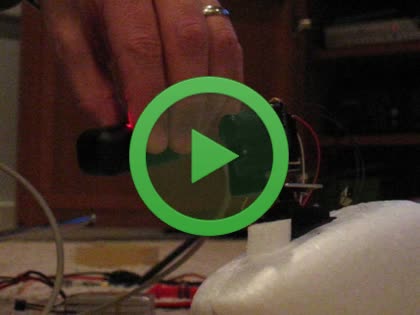
| To test the camera and the battery power system, I cobbled a little nest of wires together. | I'm using a "Watt's up" power meter to track the condition of the battery and the amount of power consumed. | |
 |  | |
| To view the signal from the camera, I used the Picture in a Picture feature of my computer monitor! | Here is the entire video setup: Camera, battery, voltage regulator and transmitter. | |
 |  | |
| To test it, I hooked up the receiver to my old slingbox (I have a slingbox pro now!) and used my laptop to view the signal, which had a several second delay due to the slingbox. | Next, I turned to building the plane which will carry all of the video equipment. Like the gentleman who inspired me, I chose an EasyStar. It uses a pusher style motor mount, giving a good view up front for the camera. | |
 |  | |
| The EasyStar is the easiest plane I've built. I comes as a 6 piece foam kit. The foam is very easy to work with. The fusilage come as two halves. | I purchased a Mega Motor 16/15/4 coupled with a Phoenix 35. I decided to install the motor controller inside the fuselage to keep the weight back. Hopefully it won't overheat. This setup provides plenty of power ... | |
 |  | |
| ... enough power to cut my thumb. I was not used to having the prop near where one holds the plane. | I decided to add ailerons to the wings to provide greater maneuverability. I found an excellent description (English Translation) on how to add ailerons. I cut out a template. It greatly aided the cutting of the ailerons. | |
 |  | |
| Here, I am testing how well epoxy adheres plastic to the foam. It turns out, not very well. | ||
 |  | |
| So, I used lots of CA. It holds quite well. | I used 3M Blenderm tape for hinges. Fantastic tape for this purpose. | |
 |  | |
| I found I had to cut a greater angle to provide enough throw. Using a straight edge helped a lot. | Next, I made a tape template of an HS-50 which will control the aileron. | |
 |  | |
| I taped off the cutting blade to the depth of the servo, and cut the outline into the bottom of the wing. I then cross cut the inside to the depth of the servo. | Then I simply pulled out the pieces to make a perfect cavity for the servo. | |
 |  | |
| Next I traced the path the servo wire would take. | I constructed a special blade to cut a channel for the wire. Very similar to one I made in an earlier project. | |
 |  | |
| The foam in the cut channel comes out easily. | I had to extend the servo wires. | |
 |  | |
| The servo and wire fit snugly. I used more Blenderm to fix the servos and wires in their channels. If I have to replace a servo, it will be very easy. | The completed wings. | |
 |  | |
| I CA'ed HS-55's into the fuselage. I put Vaseline on the servo to ensure the CA would not creep into places it should not be. | I also used Vaseline to make the CA does not get into the control rod sleeves. | |
 |  | |
| The HS-55's fit very well into a corner of the cavities for the elevator and rudder servos. | I CA'ed in a support for the sleeve of the rudder control to give it extra rigidity. | |
 |  | |
| The antenna comes out the "anus" of the plane :-) | The completed plane. Next I need to test it. I found that even with a 2100 battery, the center of gravity was well back of where it should be. This is good, as I will be adding quite a bit of weight to the front of the plane. | |
 |  | |
| I also constructed a mechanism to hang the plane from my office wall. | Kenny can hold the plane as well. Not a good long term solution, though :-) | |
 |  | |
| Next, I turn to the camera pan and tilt mount. I decided to machine a piece of plastic in which the camera would mount. Here is the first proto type. | I used a old disk enclosure for the plastic because it was about the right thickness, and had a 90 degree bend in it already. My Dremel tool investment has paid off :-) | |
 |  | |
| The camera has a 14mm square face which fits snugly. The camera is a KX141 from Black Widow AV. | Here's my third attempt at the plastic part of the mount. The first two were meant to mount on the side of the servo. Here I decided to mount it to the bottom. | |
 |  | |
| Most of the tooling of the plastic piece was done with an exacto knife. Very tedious. | Here's the complete mount. I used an HS-5245MG digital servo for the pan. This servo can be programmed to move through 180 degrees or more of motion and seems to be fairly tough. | |
 |  | |
| I used an HS-56HB for the tilt. It does not have to support as much weight nor does it have to move as much as the pan servo. | Pan and tilt servo | |
 |  | |
| The metal bracket connecting the pan servo to the tilt I got from Lynxmotion. I cut off the part I did not need. Hopefully this mount will be sturdy enough. It weighs in at 68 grams. | Here I load up the Easystar with all the components with which I expect to fly. With battery, it weights 760 grams. Note that I intend to mount the camera pretty far forward. All seems to balance well. | |
 |  | |
| Head mounted Gyro. | Here I have installed the camera at the nose of the plane. I wanted a good field of view without the nose present all the time. I may stick a carbon fiber rod in front of the camera to give me a visual reference as well as a potential indicator of speed. Perhaps I'll even mount a small gun sight on the tip :-) | |
 | ||
| I purchase a tripod on which the antennas and receiver are mounted. Fixed to the tripod are two smaller ball and socket tripods called UltraPod II's. This way the antennas can be pointed in the right direction, and I don't have to extend the coaxial cables. | ||